Creating a new project
This guide describes how to create a new project in the Alpha Strike Labs Platform. A project serves as a container for the targets you wish to monitor, such as domains, email addresses, keywords, IP addresses, or CIDR ranges, and forms the basis for all subsequent scans and monitoring activities.
Prerequisites
Before you begin, please ensure the following:
- You are signed in to the Alpha Strike Labs Platform.
- You have access to at least one company to which the project can be assigned for billing purposes.
Step 1: Access the projects overview
Select Projects from the main navigation bar. The overview lists all existing projects and provides the New project button in the upper left area of the page.
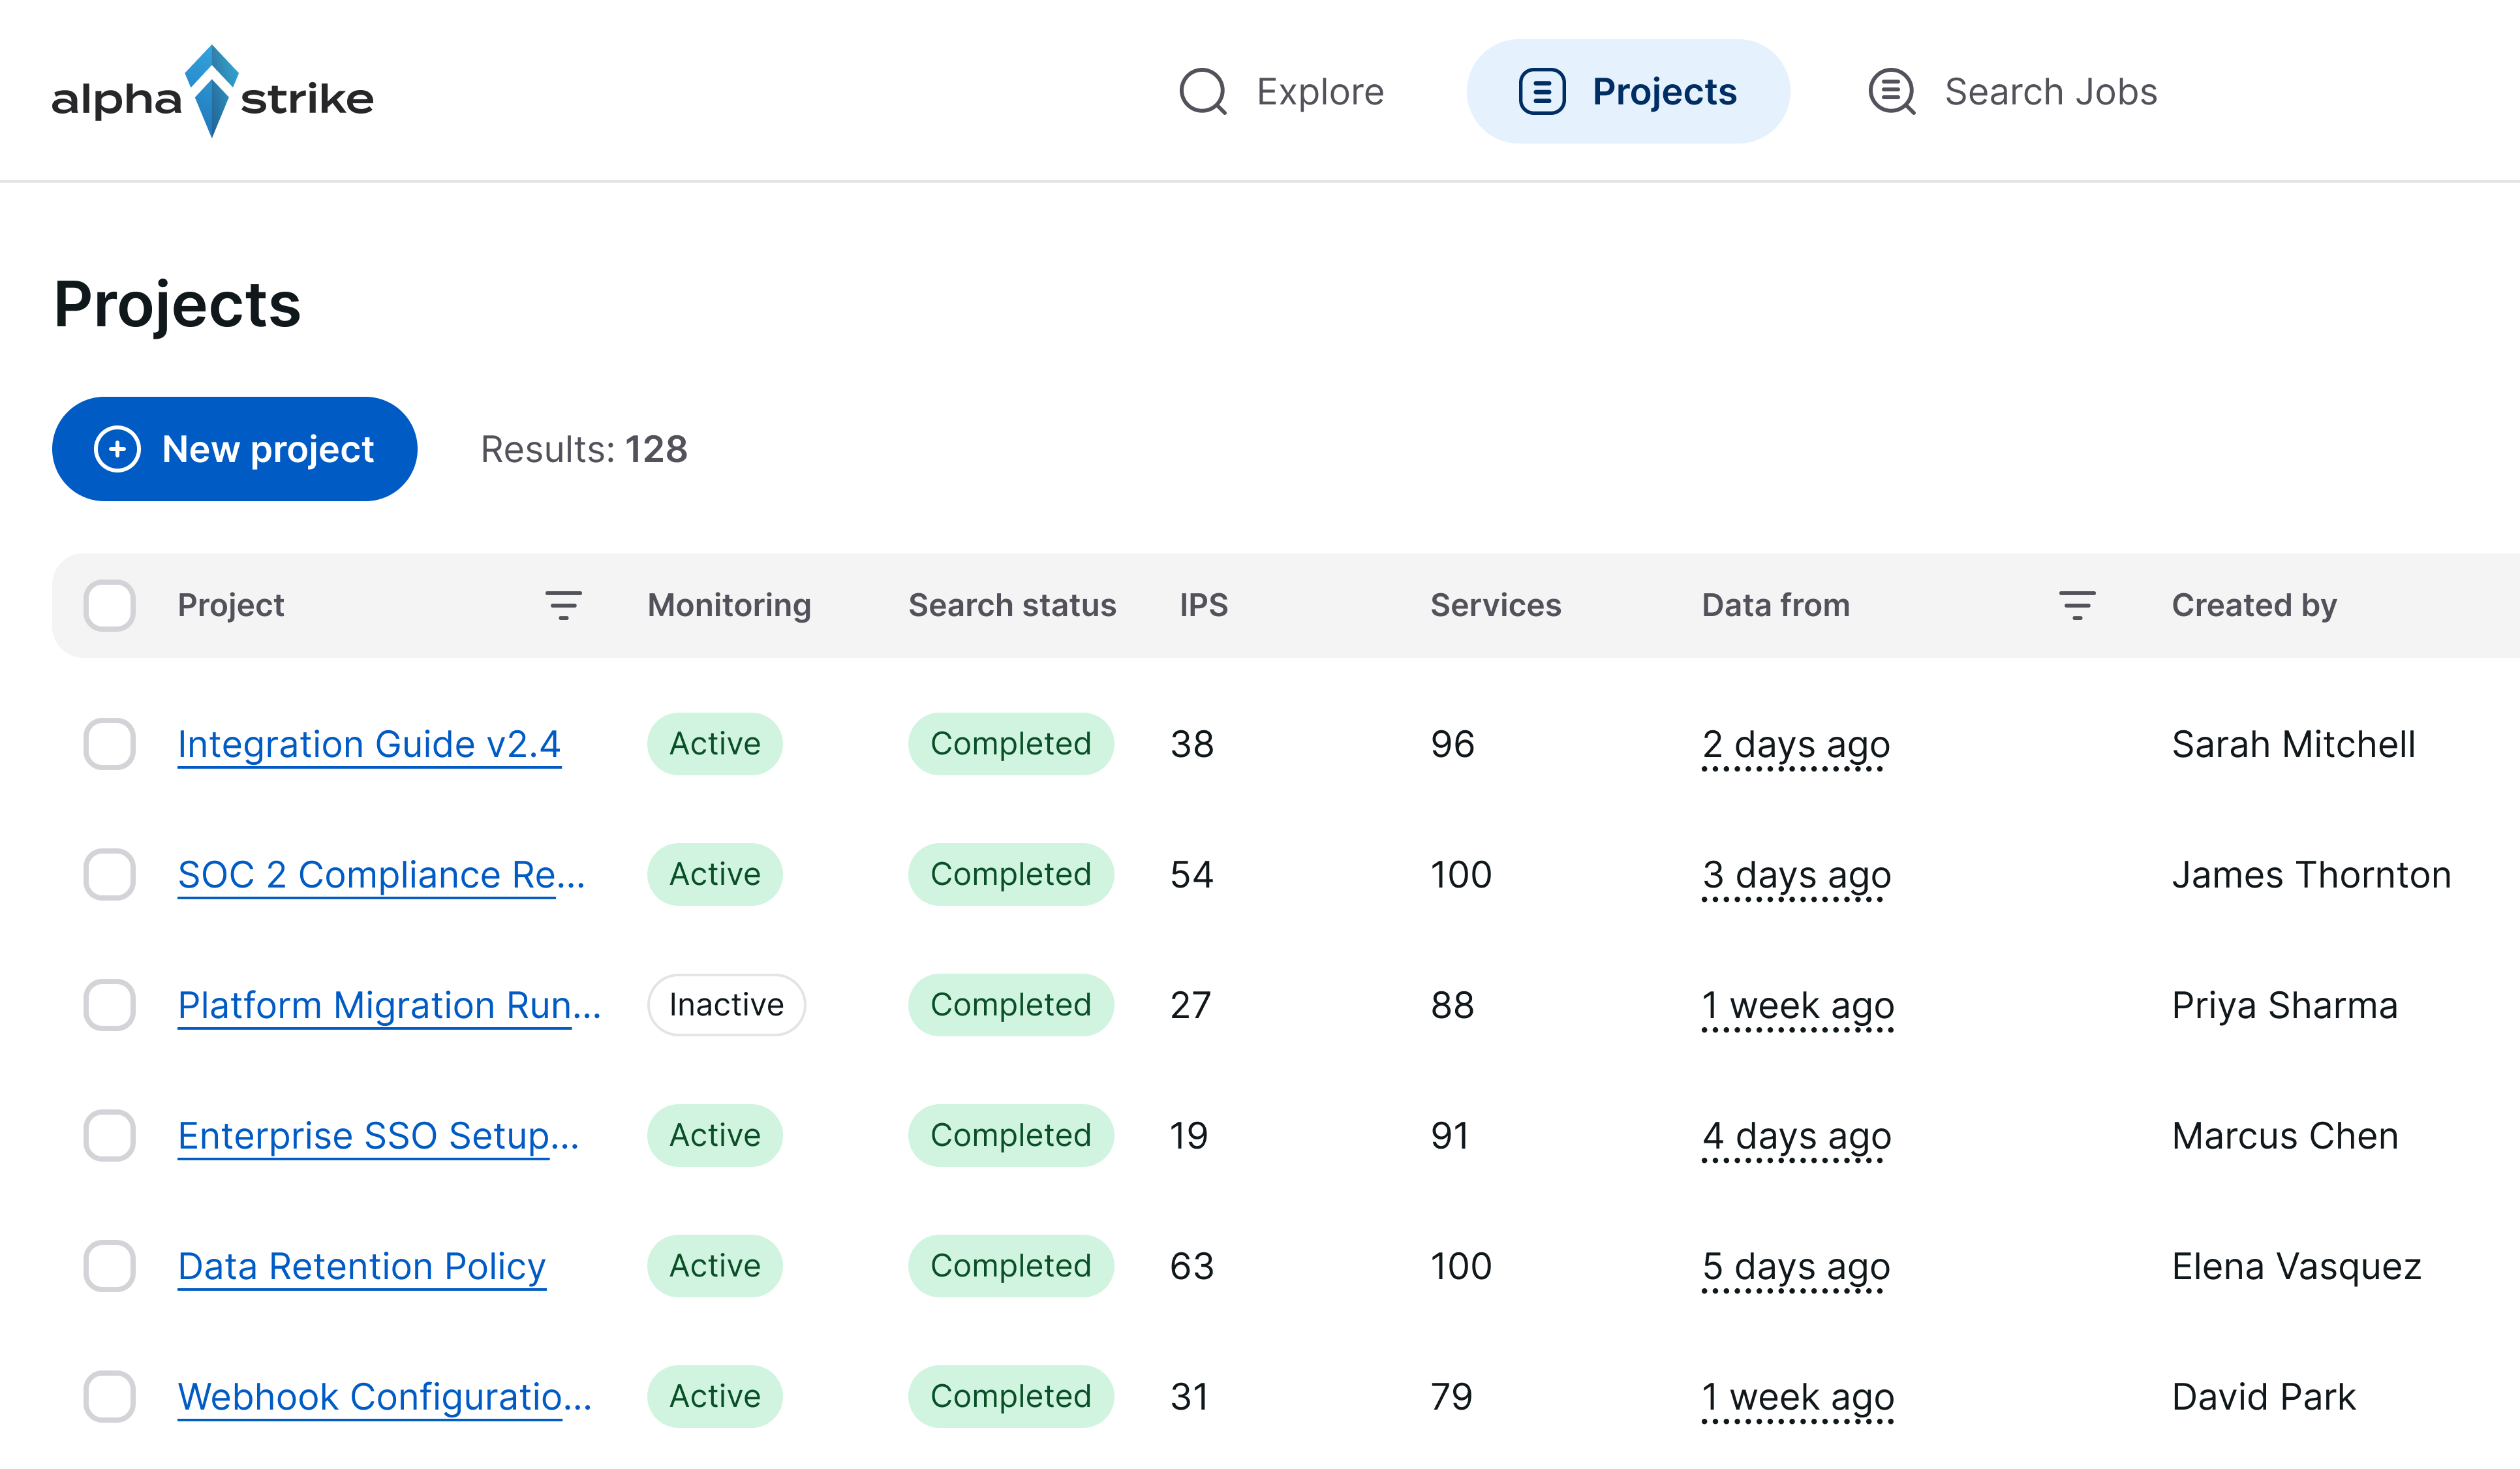 Figure 1: Projects overview
Step 2: Open the project creation dialogue
Select New project. A two-step dialogue opens: Step 1 of 2 - General and Step 2 of 2 - Scope options.
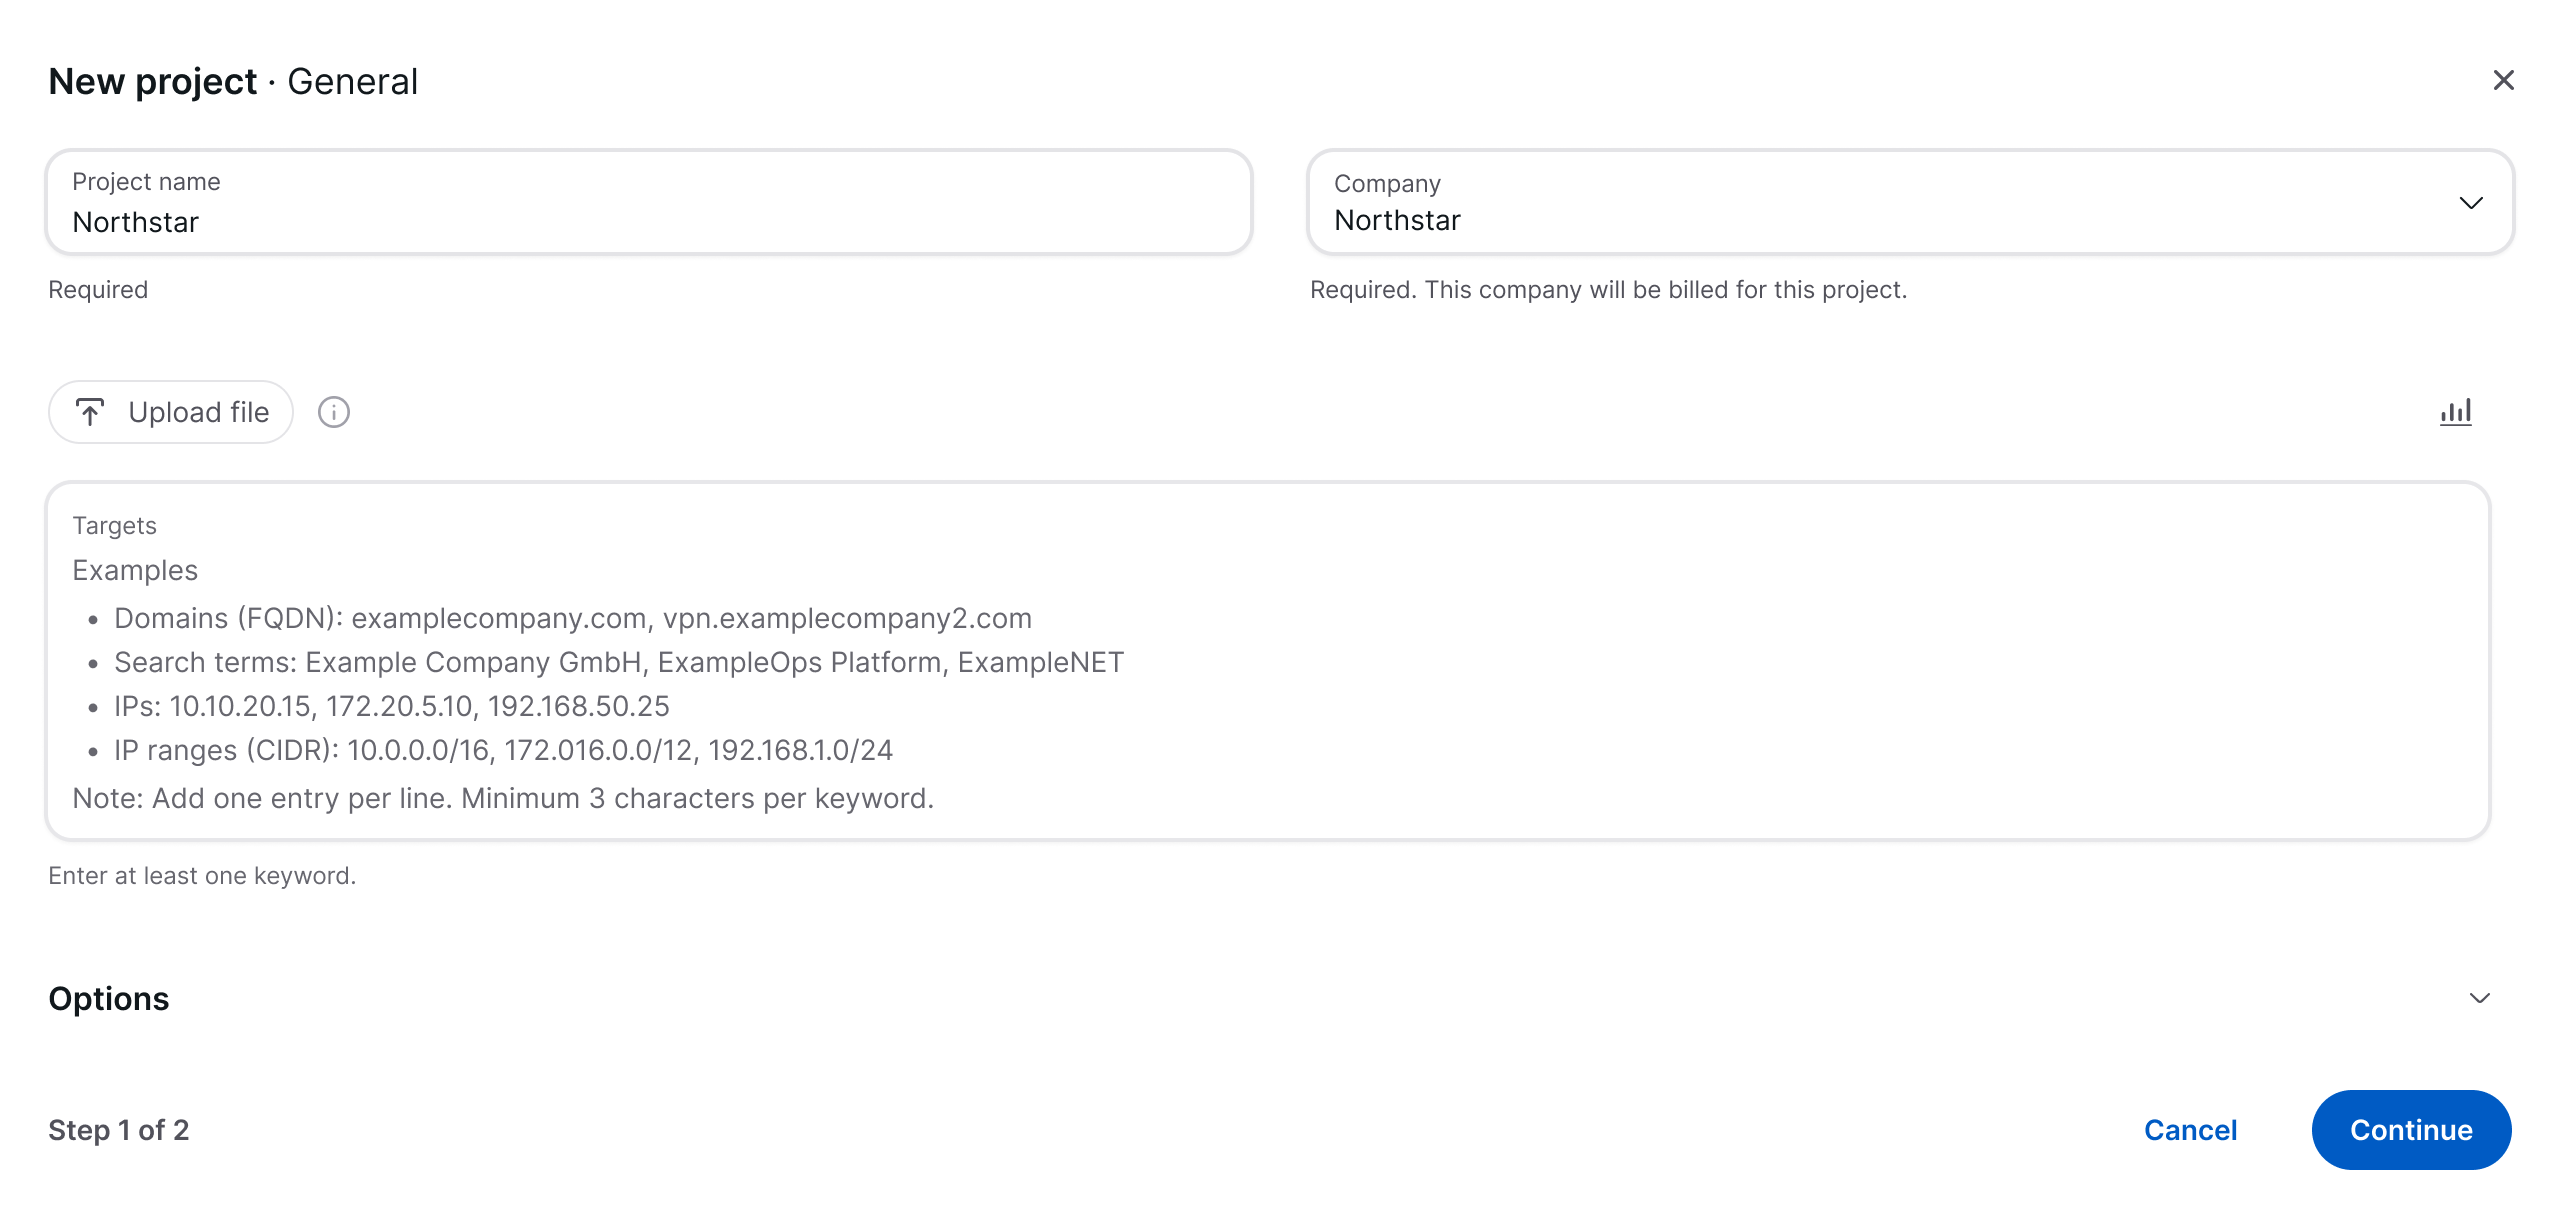 Figure 2: New Project - Step 1
Step 3: Enter the project details (Step 1 of 2 - General)
Complete the following fields in the General step:
| Field | Description |
|---|---|
| Project name | A descriptive name for the project. This field is mandatory. |
| Company | The company to which the project is assigned and whose quota is used. If only one company is available, it is preselected and the field is read-only. If several companies are available, the first is preselected; use the dropdown to choose the company for this project. |
| Targets | One target per line, for example, a domain (FQDN), email address, keyword, IP address, or IP range (CIDR). This field is mandatory and requires at least one target. Examples: Northstar, northstar.com, security@northstar.com, 10.0.0.0/22, 10.255.0.2, fe80::, fe80::8/126. |
As an alternative to manual entry, you may select Upload file to import a TXT file containing your targets (maximum file size 0.5 MB, one entry per line, up to 400 characters per line).
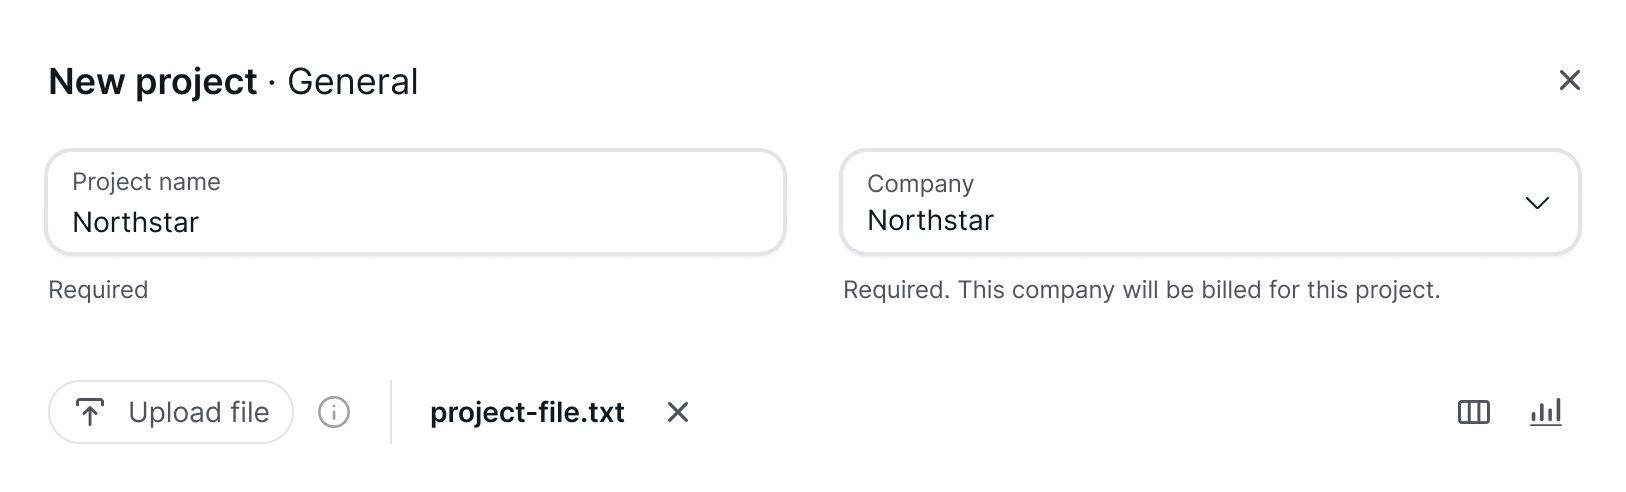 Figure 3: Upload file
Step 4: Configure scan options (optional)
The Options section (expandable) allows you to select a preset and to adjust the scan configuration in detail. The following options are available:
| Option | Purpose |
|---|---|
| Keyword search in HTTP body | Enables full-text search within the body of HTTP scan results. May increase the number of false positives. |
| Add keyword search results to assets | Adds keyword search results directly to the project assets rather than staging them in the discovery area. |
| Subdomain enumeration from domains only | Restricts subdomain enumeration to the base domain when a subdomain list is provided. |
| Use external active subdomain enumeration | Enables active DNS subdomain enumeration using predefined wordlists. |
| Use external passive subdomain enumeration | Enables passive DNS subdomain enumeration by querying external databases. |
| Take screenshots of HTTP(S) services | Captures a screenshot of each identified HTTP(S) service. |
| Enable domain squatting on domains | Monitors for domain squatting attempts on your specified domains. |
| E-mail security checks | Checks TLS, SPF, DMARC, DKIM, MTA-STS, DANE, and DNSSEC for the mail domains of the project. Available in Active mode only. See Assets. |
| Enable transliterations on keywords | Adds transliterated variants for keywords containing umlauts (for example, "Schöffer" also yields "Schoeffer" and "Schoffer"). |
For most use cases, the default settings of the selected preset are sufficient. You can enable or disable individual options using the checkboxes to tailor the scan to your project. These options can also be changed later under Project settings → Options.
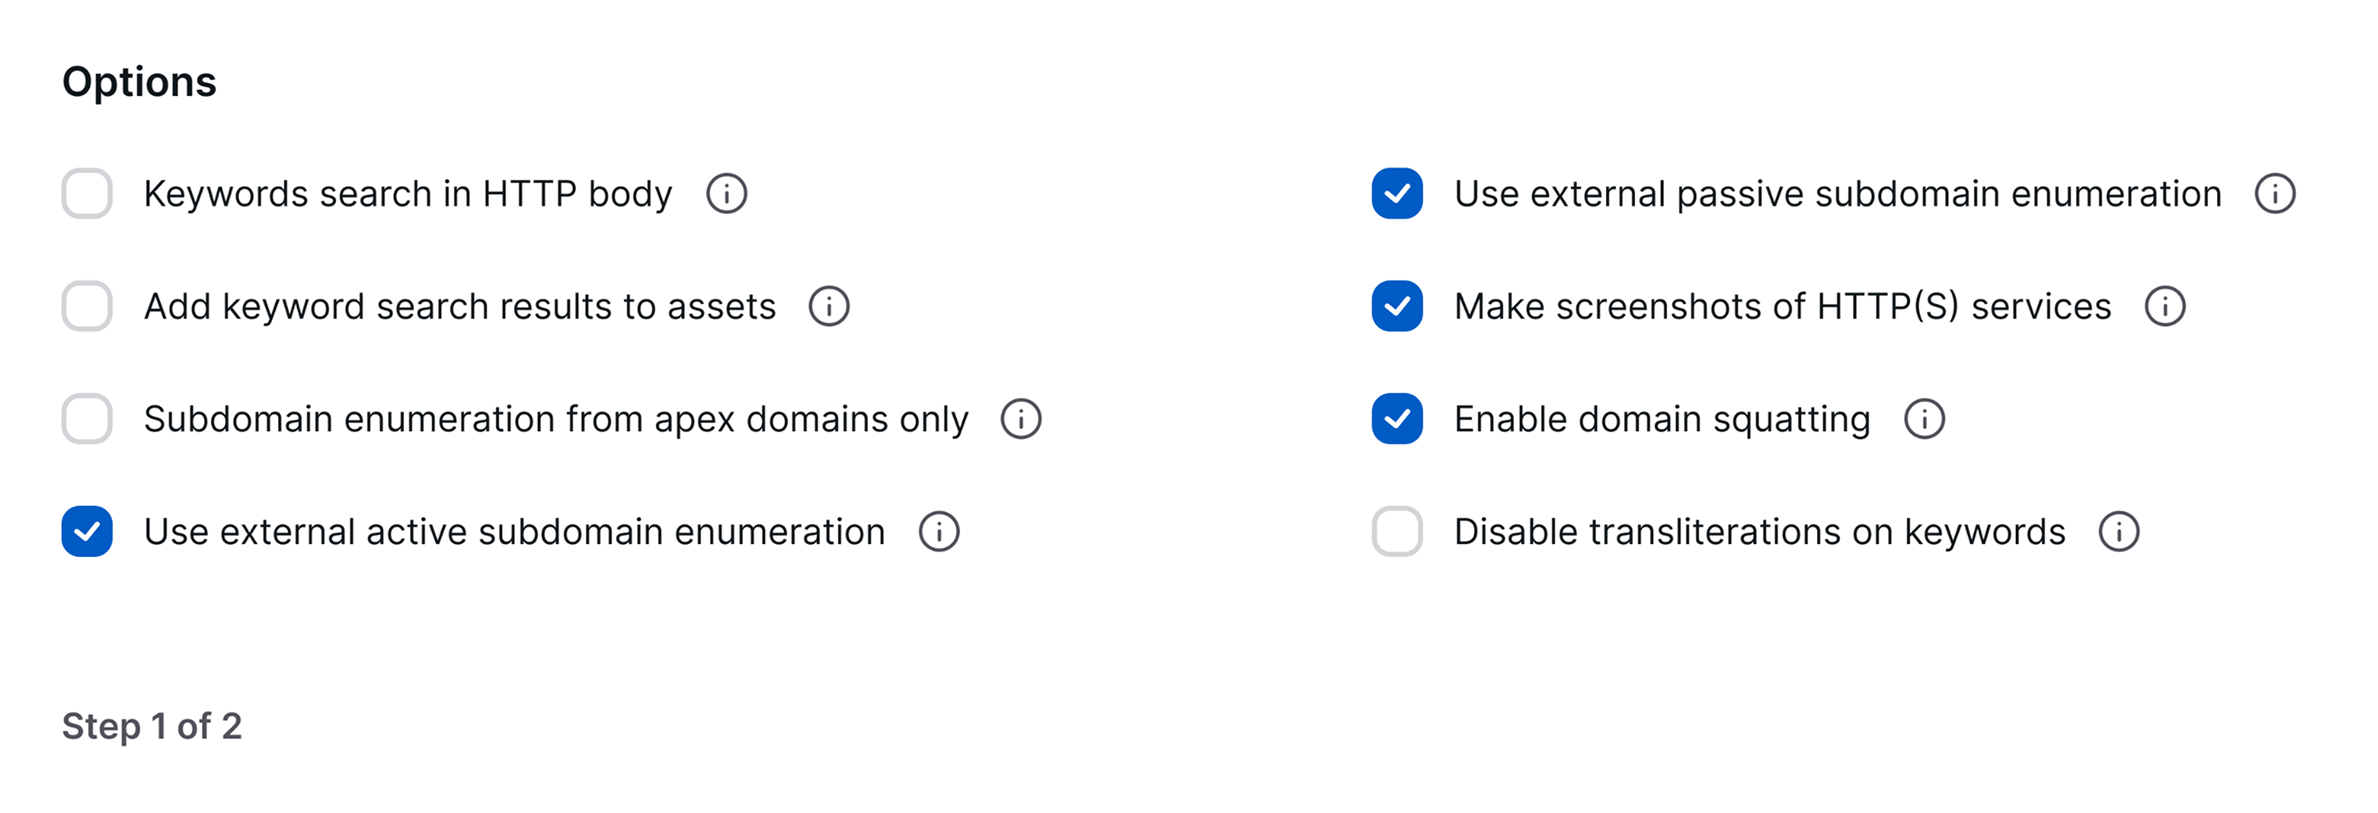 Figure 4: Options
Step 5: Review scope options (Step 2 of 2 - Scope options)
After selecting Continue in Step 1, the dialogue advances to the Scope options review step.
In this step, you can review all targets and their configurations:
| Column | Description |
|---|---|
| Target | The domain, email address, keyword, IP address, or IP range you specified. |
| Type | Identifies the target type (Domain, IPv4 Range, IPv6 Address, etc.). |
| Search scope | The sources available for this target type and company plan. Domains and administrator-created TLD entries can use Attack surface, Darknet, and Employees; email addresses can use Darknet and Employees; keywords, IP addresses, and IP ranges use Attack surface. All sources means all scopes available for that particular target. |
| Actions | Edit or delete buttons to modify or remove individual targets. |
You can modify targets or delete selected targets at once before creating the project. After reviewing the scope configuration, proceed with creating the project.
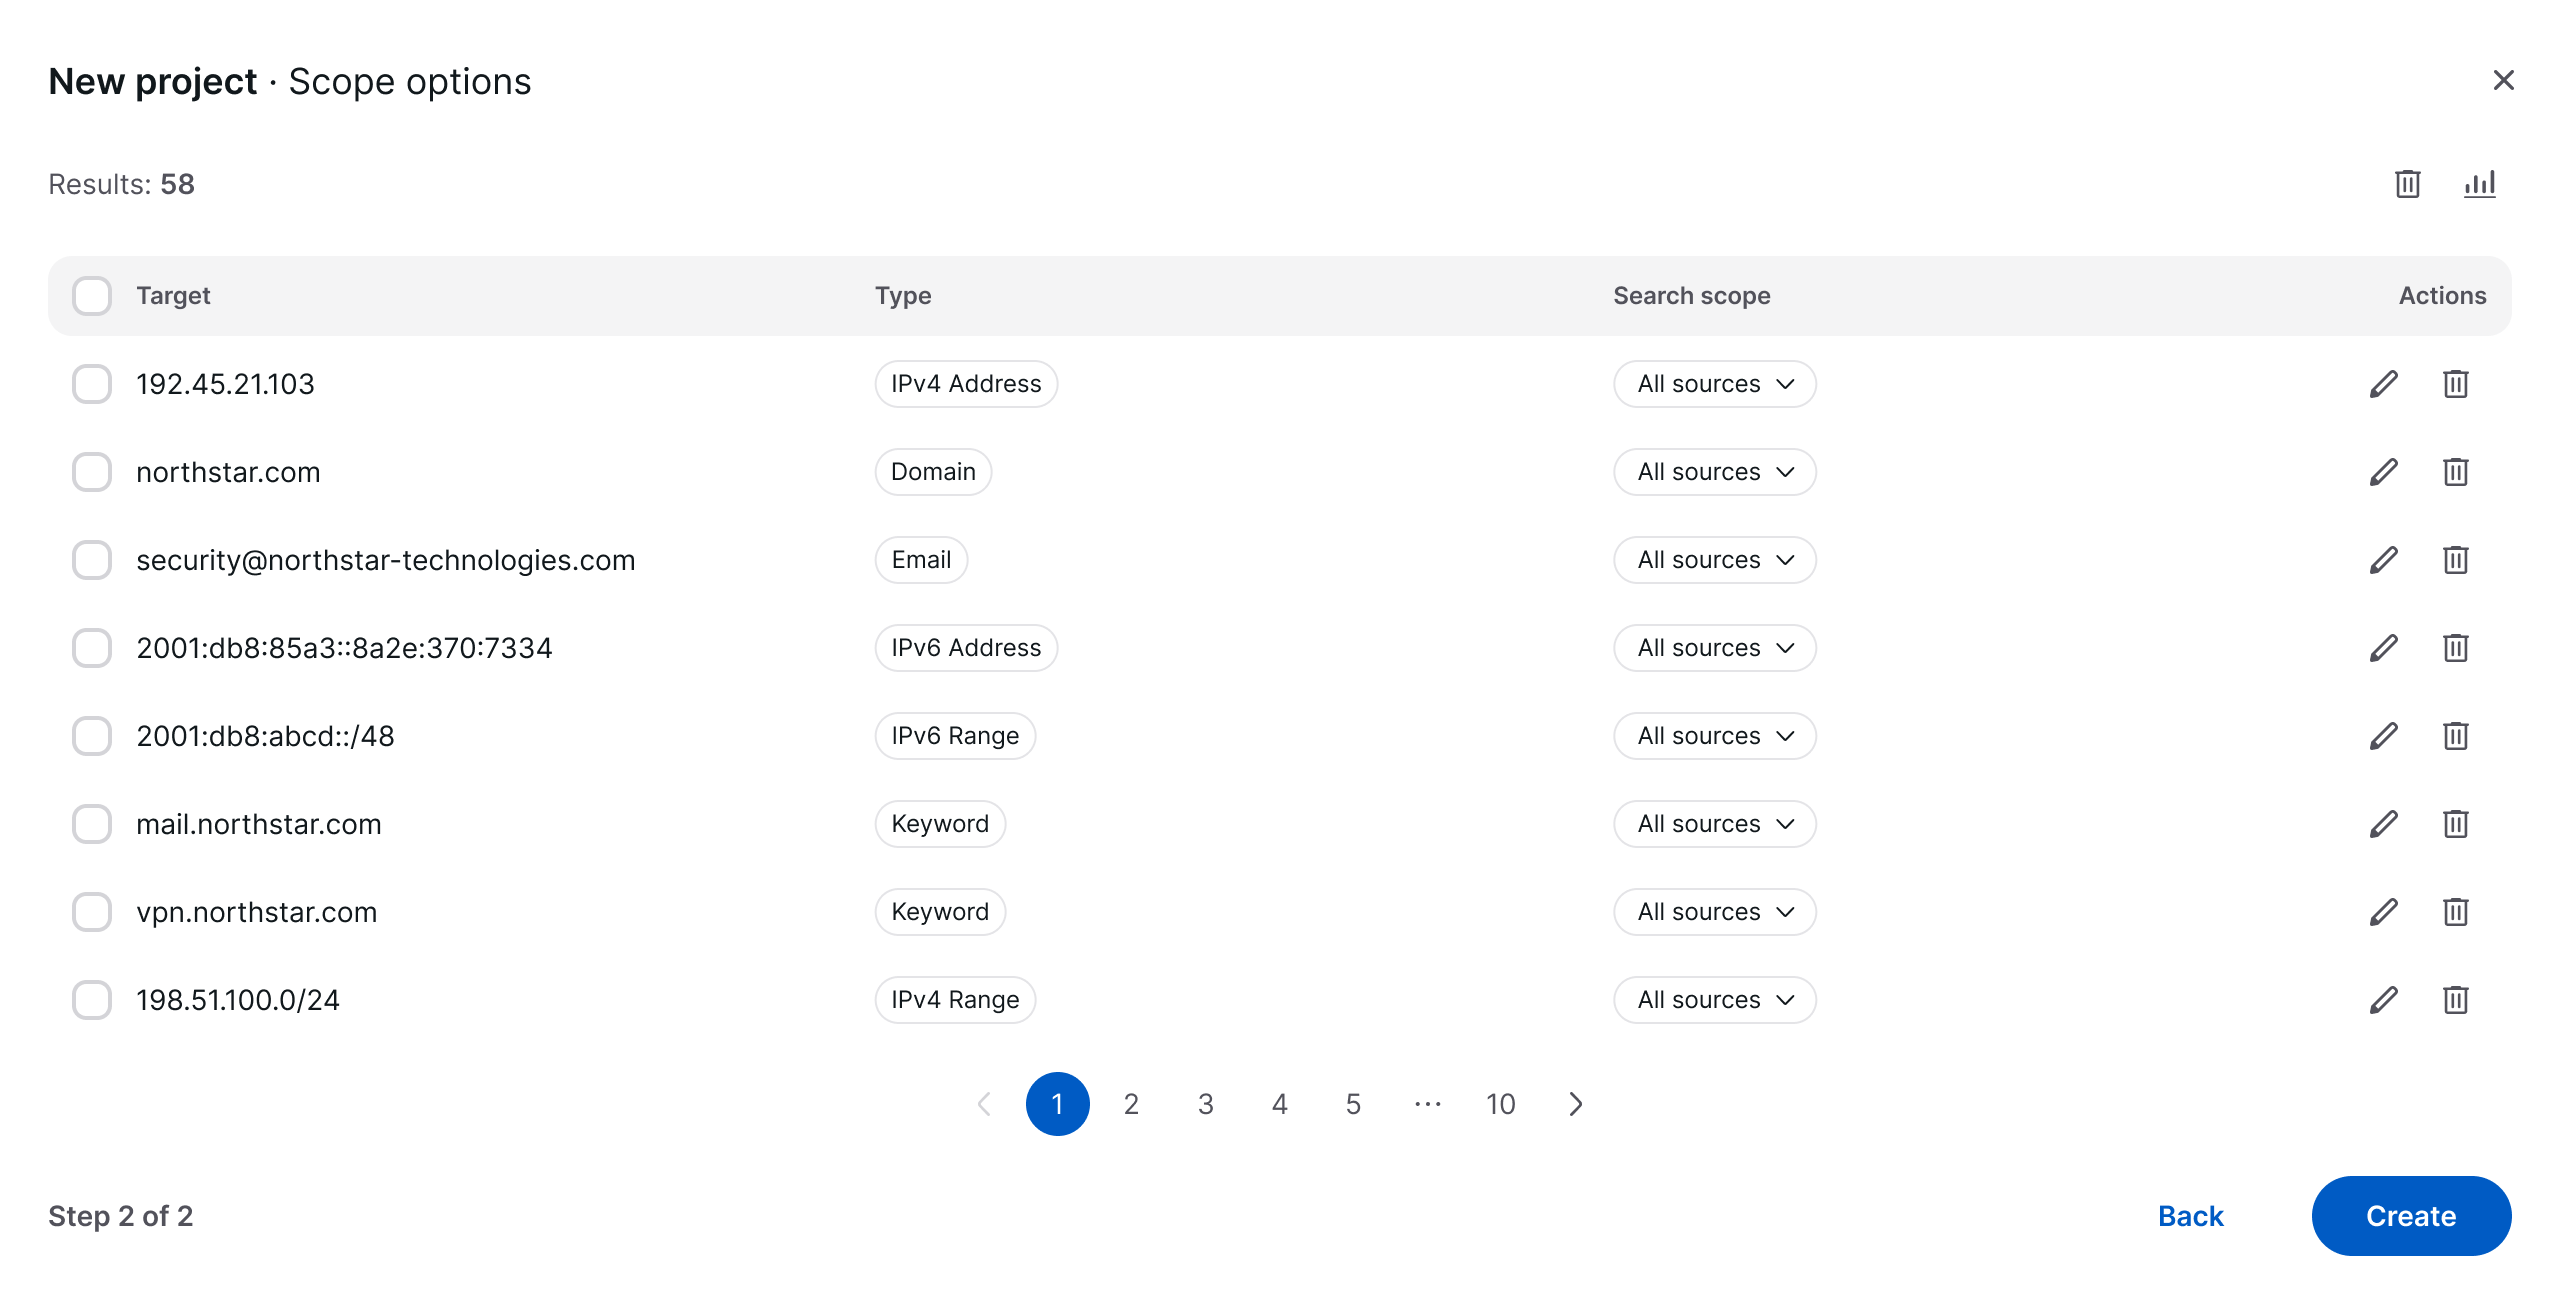 Figure 5: Scope options
Step 6: Create the project
Once you have reviewed the scope configuration in Step 2, select Create. The project is created and subsequently appears in the projects overview.
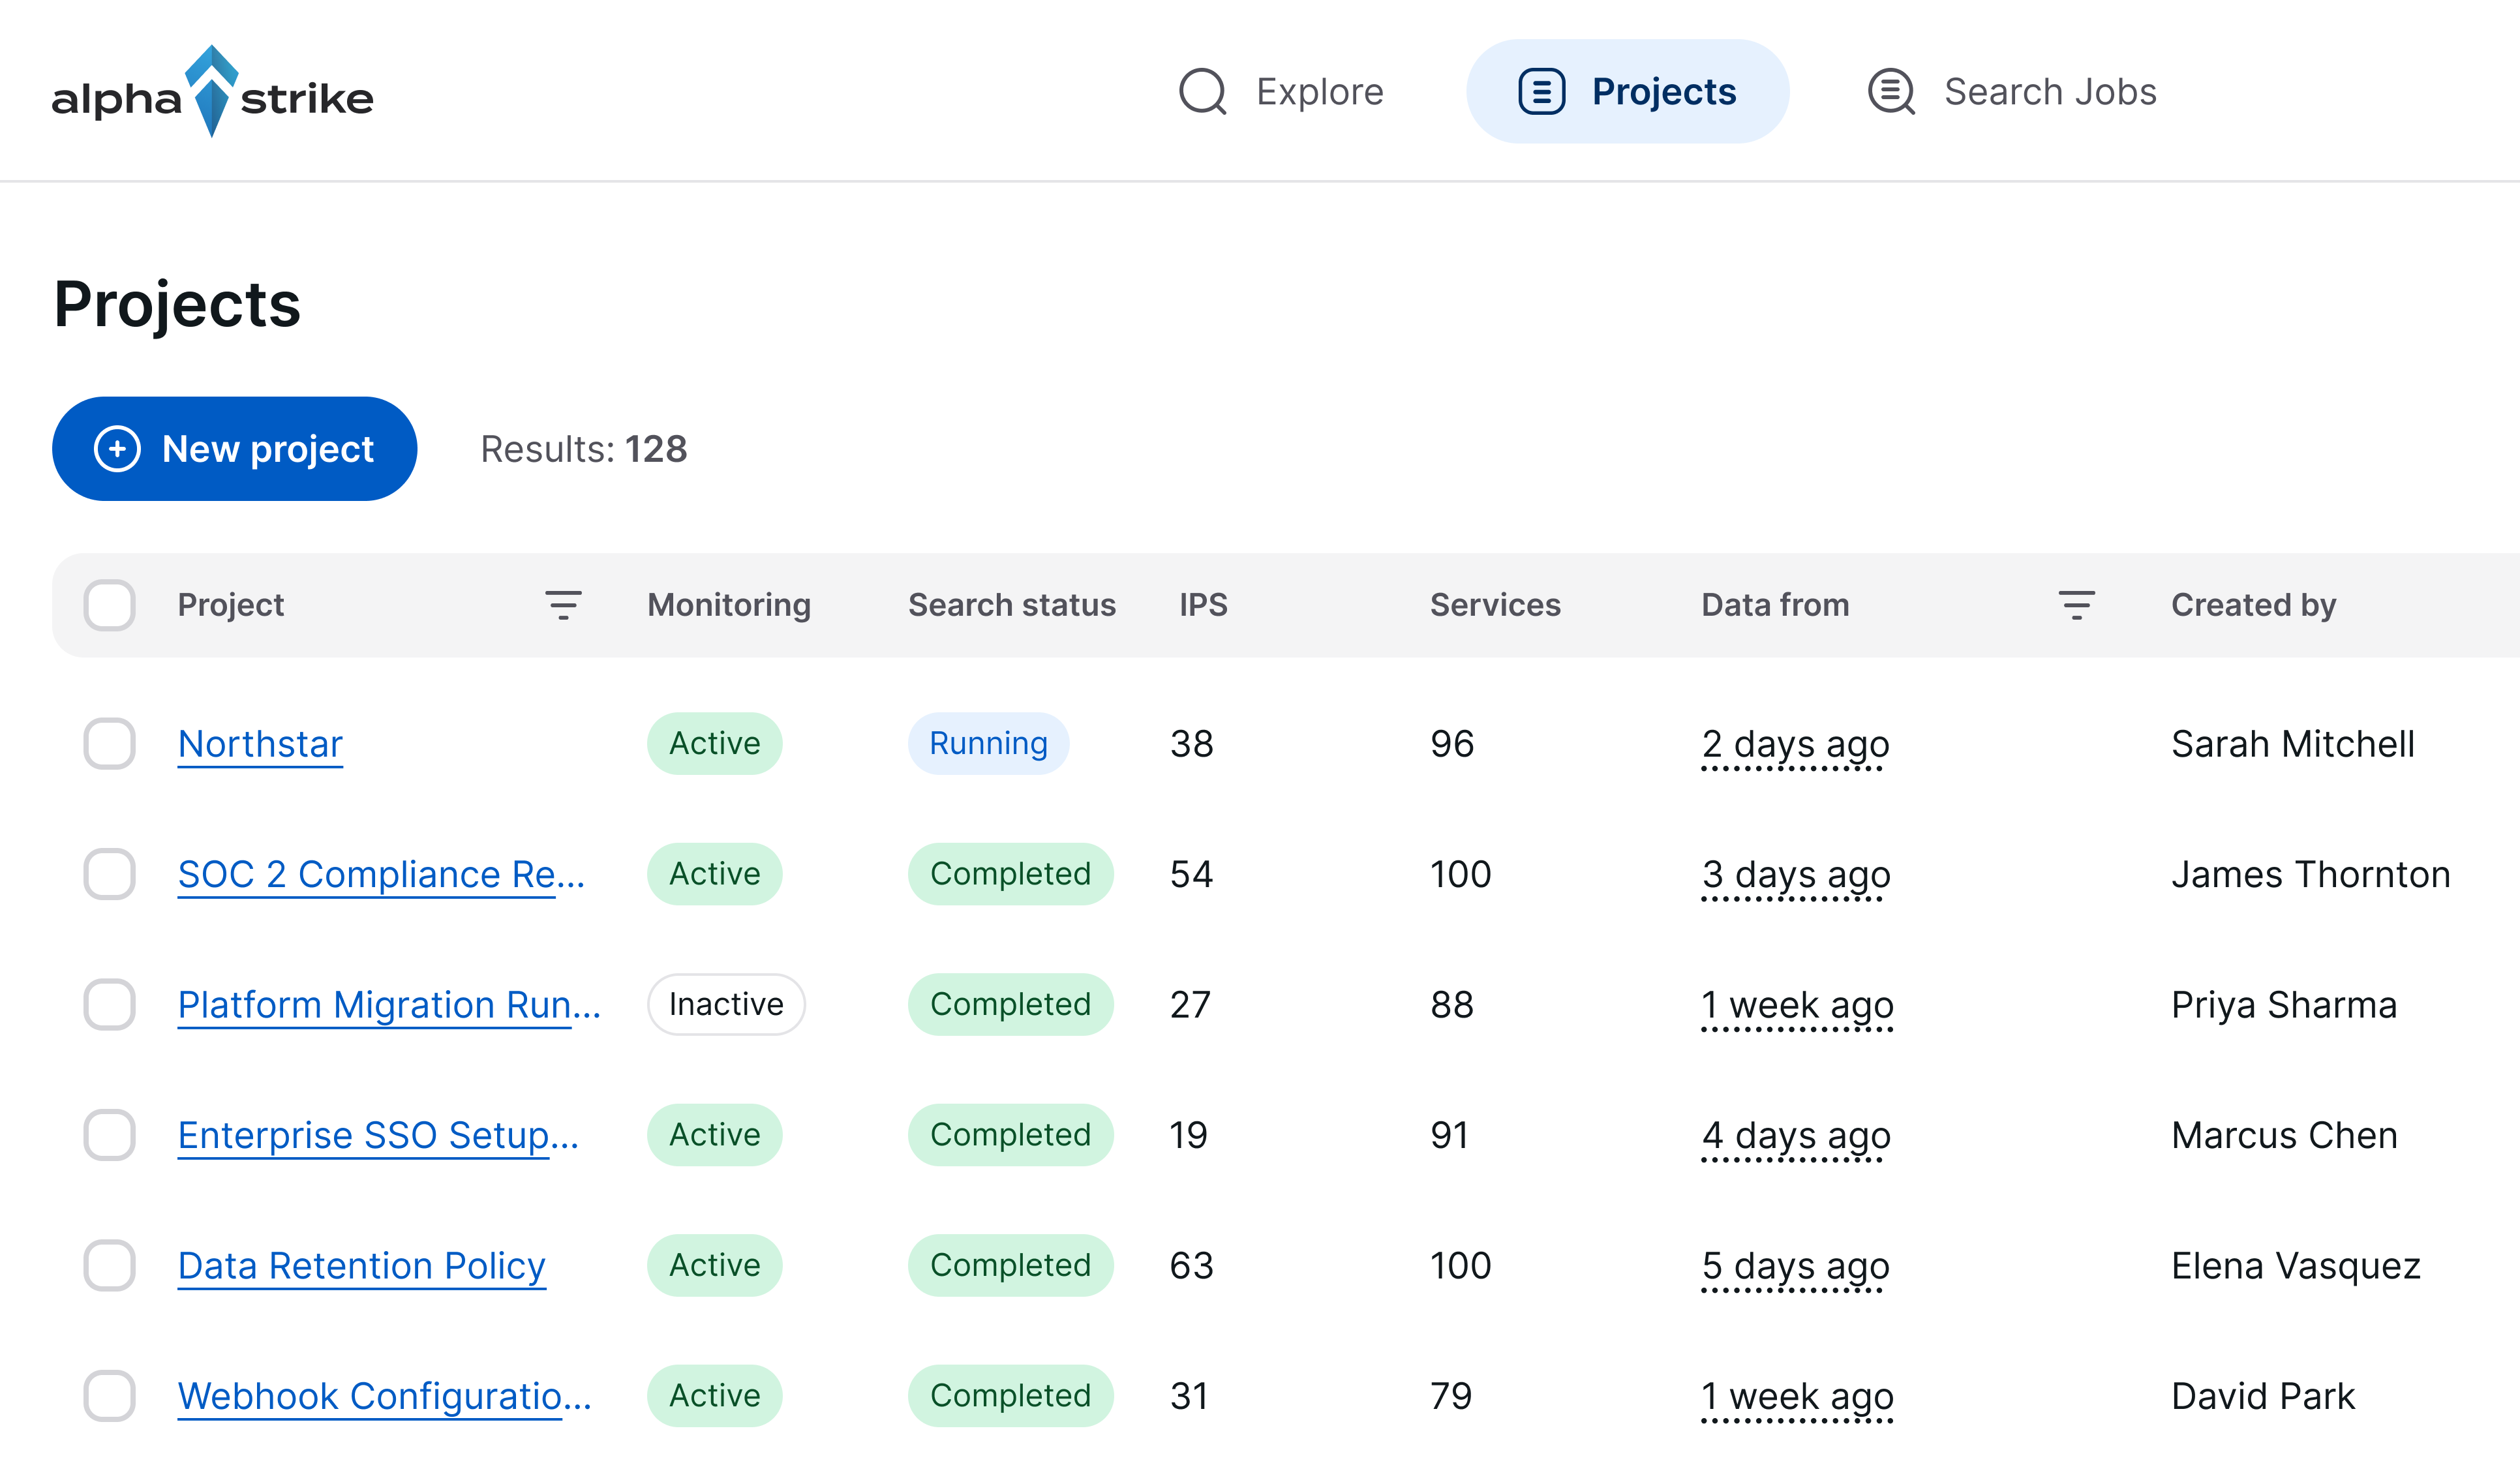 Figure 6: Project added to the list
Result
Your project is now listed in the projects overview. Its monitoring status is initially set to Inactive until the first scan or monitoring cycle is started. From the overview, you can open the project to initiate scans, review discovered assets, or adjust the project configuration.